Blur Animation

i like this one, its a simple but good looking text transition effect that could prove very useful at some point
---------------
Fire/Lava Effect

useful if you need some lava for a signature and easy to make
--------------
and then here are some i made in the past upon request or boredom:
---------------
Animated Snowing Effect
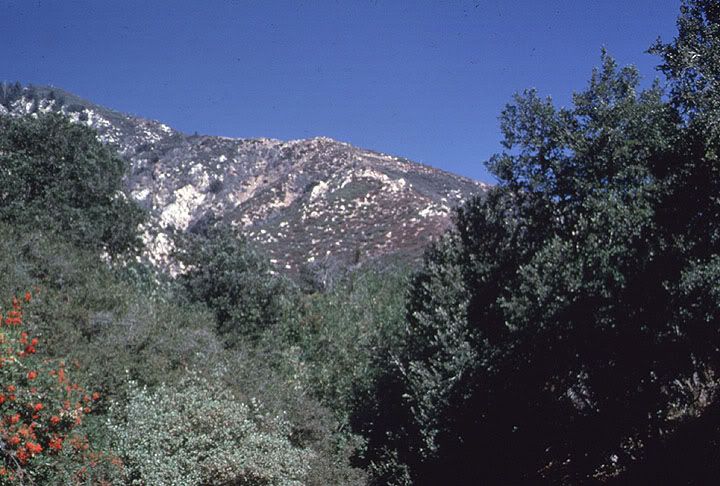
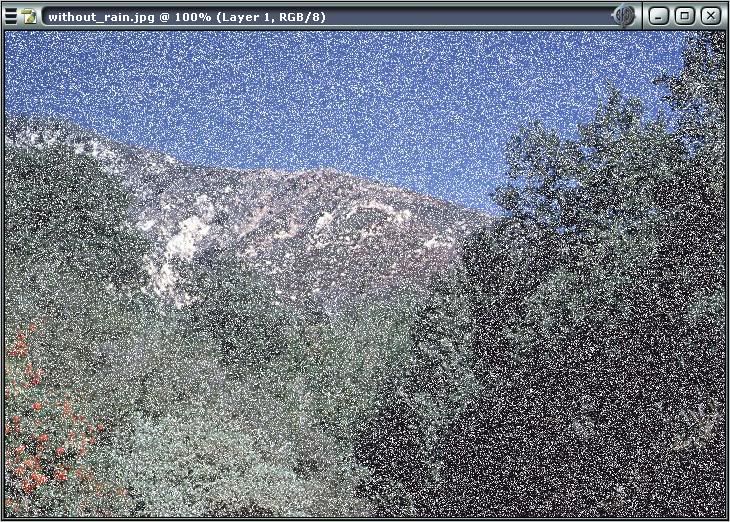
1. First, open your picture on photoshop, in this tutorial I'll be using this picture below
2. Next, add a new layer and make it black using the paint bucket tool.
3. Then, change the blending mode to screen
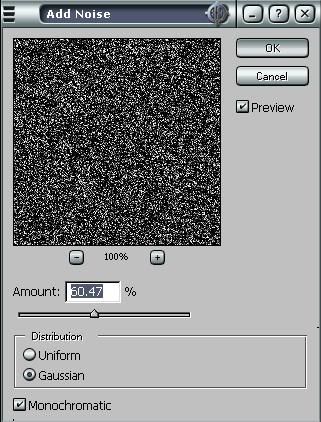
4. Now go to Filter > Noise > Add Noise and set it to levels similar to the ones seen in the picture below
It should now look something like this:
5. Next, go to Filter > Blur > Gaussian Blur. and set Radius to 1.1 pixels
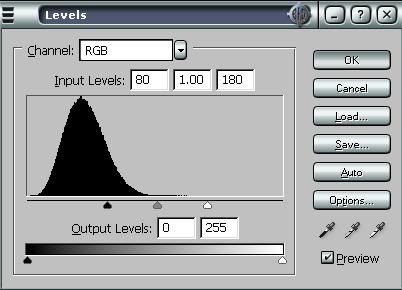
6. Then press CTRL+L to bring up the levels, it should look like the picture below. Note that you can vary your last input number depending on your picture to decide how you want the opacity of your snow to look, the higher the number, the less noticable and more transparent it is.
7. Now repeat steps 2-6 about 4 times, varying step 4 slightly to make the snow more dynamic
8. Now time to edit it in imageready, click on the button to export the image to imageready
9. Create as many identical frames as you have layers of snow.
10. On the first frame, make all layers not visible except for your first layer of snow and your image.
11. On the next frame make only your image and the second layer of snow visible.
12. Repeat this until each frame has a different layer of snow.
13. Set frame length to somewhere near .1 seconds per frame
14. Save optimized as whatever you want.
unfortunately can't host the final animated picture because photobucket says the image is too big
There you go, hope it helped.
----------------
This is a very openended tutorial, you can do many many things before you do the actual effect, i will give you one example, but you can go much more in depth to get a better effect like i did for my 3rd image. I will notify you at points when a lot of openendedness comes into play, and may even give you some other suggestions for cool effects. I will also just be taking the straight boring path to save time as i create this tutorial
1. The first thing you do is open a new document, i will be using a 800x600 pixel canvas.
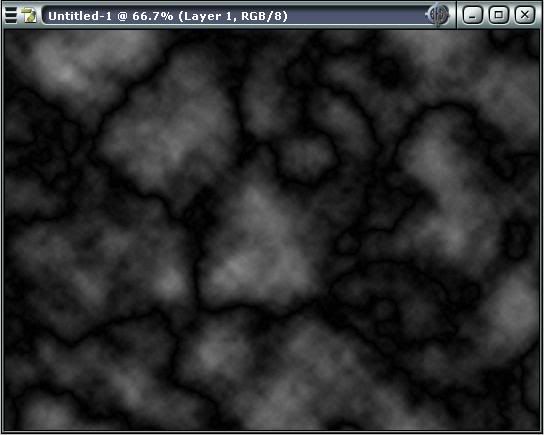
2. Next, go to Filter > Render > Clouds
3. Now go to Filter > Render > Difference Clouds
**at this point there is much that you can do, you can either simply proceed to the next step or fool around with the image.**
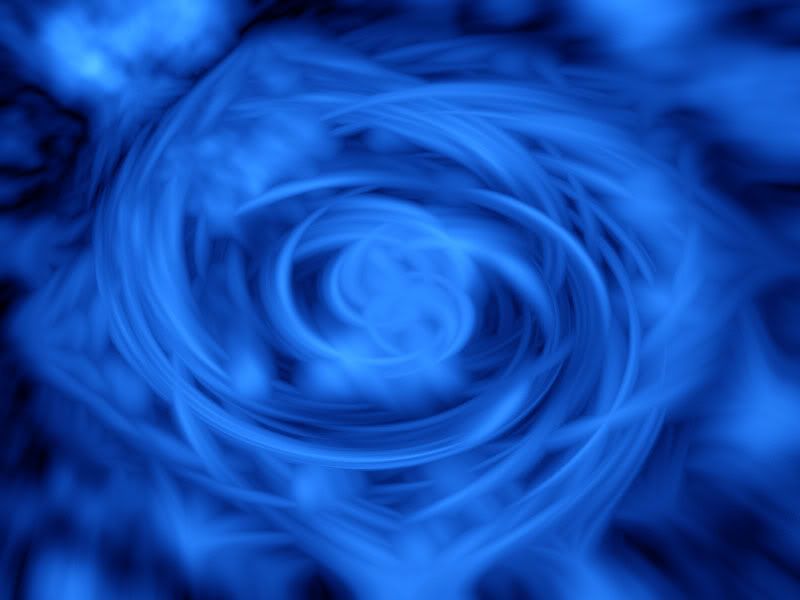
In the image fire3 above i did numerous things to make it look the way it does, and that I will explain simply, but not with much detail or pictures as i am too lazy to
Take your magic wand, set tolerance to somewhere around 20, and set continuous to off.
Now select a black area of the image and press delete.
Next, repeat steps 2-3 creating different layers about 3 more times.
Then create another layer, send it to the back, and make it black.
Next comes the effects-
On the top layers with the screwed up clouds, go to blending options, and set outer glow to on, and make it a large size. Differ the colors of the outer glow on each one to give more effect in the colors. Next, select bevel and emboss, set it to pillow emboss, make it down, increase the size slightly, and adjust other settings accordingly (i believe i set highlight color to a different color). Next select texture, and find a texture that suites you, make sure the texture is visible, but not too extremely visible. Go to color overlay, and select a color. Don't make it fully opaque, as you still want some slight variety in the color, but make it fairly opaque. In my image i used black as the overlay color.
On the bottom layer, check bevel and emboss, and texture, and set them according to whatever you want, this is just so there is no transperency is anywhere. Now make each of your top layers transparent, becoming more opaque the further back they go. On my image I used 50%, 60%, 70%, 80%, and then 100% for the background. Now go to Layer > Flatten Image, and duplicate your layer and delete the background layer so its all one layer but you can work with it again.
Now back on track with the normal tutorial
4. So now you've got an either very basic, or very strange piece of art depending whether or not you have done anything to it. The next step is to blur it
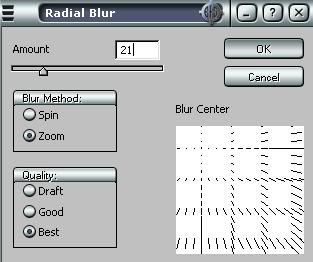
5. Go to Filter > Blur > Radial Blur, and set the settings similar to the ones below. Note that where the blur is going can differ however you want
6. Next, duplicate your layer and set blend mode to lighten
7. Go to Filter > Distort > Twirl. I set this to 300, but you can set it to whatever you think will look the best.
8. Now merge down
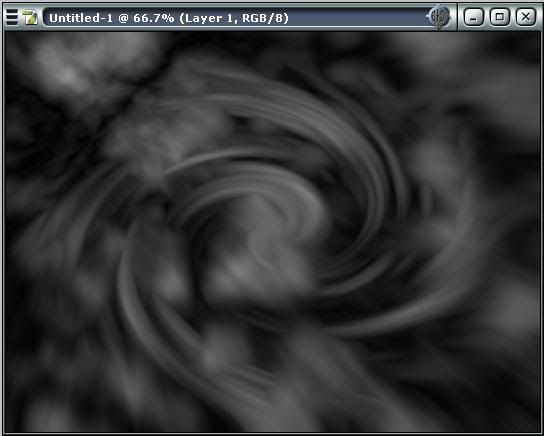
9. Repeat steps 6-8 once more, only this time, twirl to -600 (once again this can vary if you want it to look different)
10. Now you are pretty much done, you can adjust the colors to whatever the hell you want now by pressing CTRL+B and just moving the bars until you find a suitable color.
And there you go, remember that this is very open-ended and you can do a lot more with it than what i have shown you including lighting effects and lens flares and stuff
-------------------------------------------
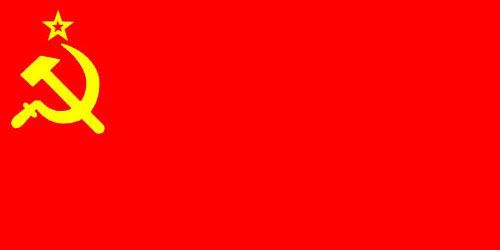
The first thing you need to do is open Photoshop, and open the flag which you wish to modify. For this tutorial I will be using the flag of the USSR. Then make sure that your flag’s layer is not background. If it is, right click on the layer and click Duplicate Layer. Then delete your background layer.
The next thing you must do is increase the canvas size. This is done by going to the Image Menu, and clicking Canvas Size. You need to add about 100 pixels to both height and width, perhaps more or less depending on the size of your flag. Remember, too much can be fixed later, but too little cannot. You do this so that once you make the flag wave, its edges will not go off the edge of the image.

Now you must create a new image with the same dimensions as your new flag image. If you have forgotten your image size, just go back to canvas size, and it will say near the top portion of the window.
This new image will be what we call the bumpmap. The first thing you must do is take the marquee selection tool and select about half of the image, it doesn’t have to be perfect.
Now select the gradient tool. Go to the gradient options where you modify the gradient. It should look something like this
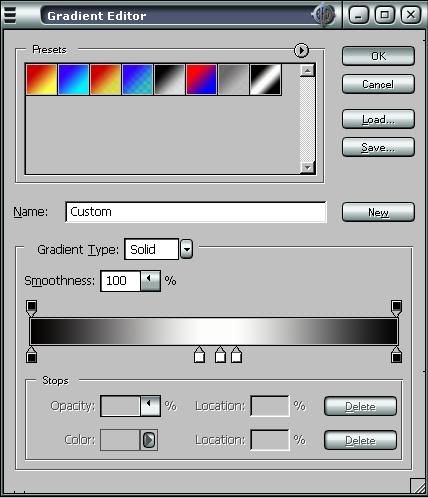
Now set the gradient to linear, and draw a horizontal line across the selection, to make it straight hold shift as you draw it. Your image should now look like this.

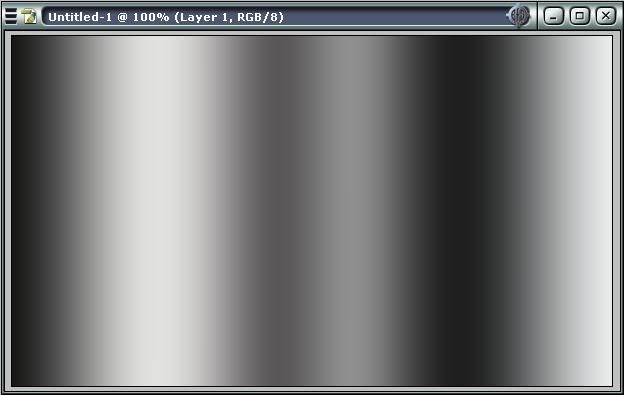
Now go to select and click inverse. Once again draw a horizontal line gradient. Now you must invert this side. So leaving it selected, go to Image, Adjustments, and click Invert. Now deselect your selection, click on Filter, Blur, Gaussian Blur. Set it to something you think looks good (needs to be blended together well). Now your image should look like something close to this.
Now time to save. Go to save as, and save it as something like bumpmap. It needs to be a .psd file. Now go back to your flag image. Go to Filter, Distort, Displace. Make the Horizontal Scale 0. The Vertical Scale depends on how much you want the flag to wave and the size of your image. I want mine to have a slight wave and it is fairly large, so I will choose 20. The Displacement Map does not matter, and the Undefined Area should be set to Repeat Edge Pixels. When you click ok it will bring up a browsing window. Select your bumpmap you created earlier and click open. Your image should now look like something close to this.

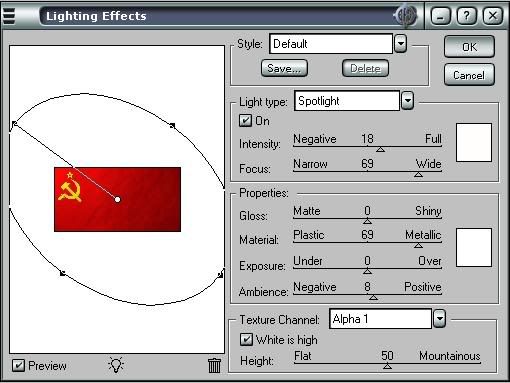
This looks good, but there is no lighting. To do this, go to channels and click the button at the bottom of it that says create new channel. Copy and paste your bumpmap into it. Go back to layers, and select your flag layer. Take out your magic wand tool and select anywhere outside the flag with a fairly low tolerance, then go to the Select menu and click Inverse. Now go to Filter, Render, Lighting Effects. Your window should look something like this when done.
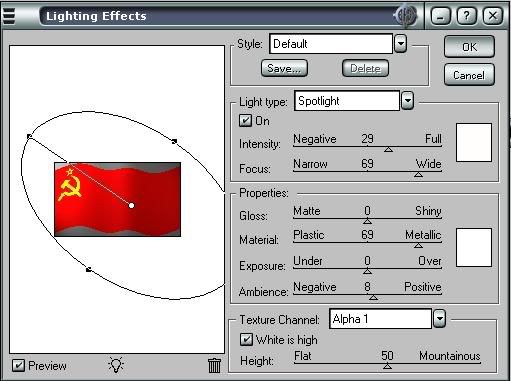
NOTICE: Texture Channel is set on the custom channel you created.
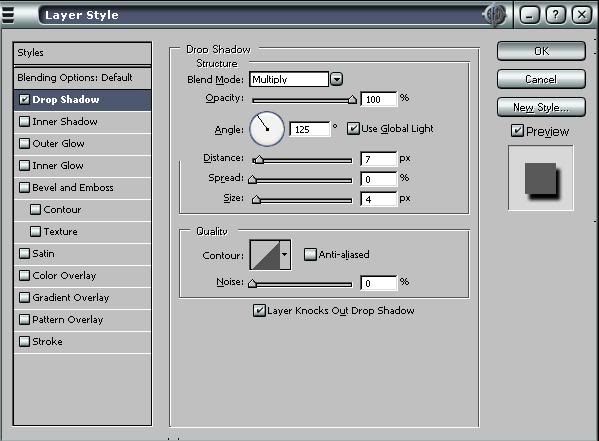
Now your image should look like a waving flag, but it seems to look a bit dull doesn’t it? To make it look slightly better, right click on the layer, and click on blending options. Go to Drop Shadow, the menu should look something like this
Now, to add a bit more, check bevel and emboss. The default setting for that should do. Now check texture. Go to the window for texture and click the arrow beside your current texture, then click the arrow on your right, and select Texture Fill 2, near the bottom. When a window pops up, click OK. Then click on the first arrow again, and select the very upper right texture. Set scale to 251% and depth to +22%. Invert should not be selected, but Link with Layer should be checked. Notice that these are my personal recommendations for the texture, use anything that you feel looks good. So now here is our final product.
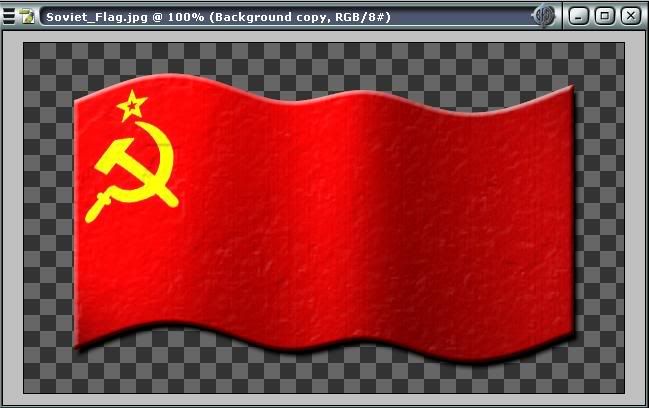
You may want to crop off some of the extra transparent space now if you have too much. Now just save it as a file type that allows transparent backgrounds such as .png or .gif.
----------------------
Refer to the Wave Effect Tutorial For More Precise Instructions
This is similar to my wave effect. I am going to use the same image I used in the other tutorial-
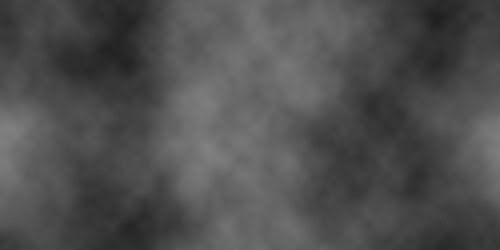
The first thing you want to do is open up the picture you want to edit. Then, create a new document with the same dimensions as your other one. Go to Image, Mode, and select Grayscale. A window will appear that says Discard Color Information? Click ok. Go to Filter, Render, and click Clouds. Your image should look something like this.
Now go back to your other image. Click on channels, and create a new channel, paste your bumpmap into it. Reselect layers, and select the layer your image is on. Now go to Filter, Render, Lighting Options and set up your window so it looks similar to the image below (it does not matter which direction the light is coming from). Be sure to select your custom texture channel before you click ok.
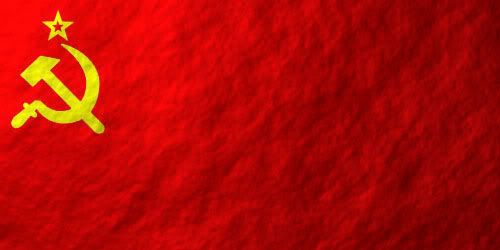
Your final piece should look something like this.
--------------------
and since ive gotten many comments (not necessarily on this forum) about the shape and the embossment of my sig, im makin one. So please add to the list and maybe we can get some good ones to help people out with new sigs